 LYNX SHARE
Automation
Move a knob over time with automation clips, pattern events, controllers or modulators.
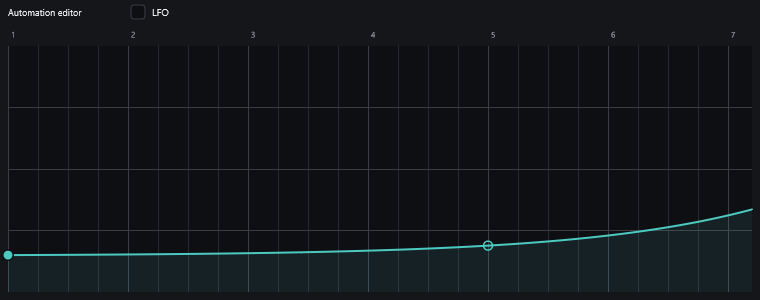
An automation clip is a curve on the Playlist that moves one control while the song plays: a channel's volume, a mixer fader, a plugin parameter, the tempo. The clip has its own editor window, the Automation editor.
There are three other ways to move a control. Events are values stored inside a pattern. A link makes a MIDI knob or an internal controller drive the control. A modulator wobbles a knob around its own value.
Automate a knob
- Move the playhead to where the automation should start, or select a time range in the Playlist.
- Right-click the knob or fader and choose
Create automation clip. - The clip lands on the first empty Playlist track and the Automation editor opens. The curve starts as a flat line at the control's current value.
- Click in the editor to add a point, and drag it to its place.
- Hold
Altand drag a segment up or down to bend it. - Play the song in Song mode. The control follows the curve.
Other ways to get the same clip:
Add › Automation for last tweaked parametermakes a clip for the control you moved last.- The last tweaked read-out, and
Tools › Last tweaked, open the same menu as a right-click on the control. - For a third-party plugin, open the channel's menu in the Channel rack or the effect slot's menu in the Mixer and use
Automate plugin parameter.Automate MIDI controller (CC, aftertouch, pitch bend)is next to it.
To open the editor again, double-click the clip, or right-click it and choose Edit points.... Edit automation clip... in the control's own menu does the same.
The Automation editor
| Command | Key | What it does |
|---|---|---|
| New point | Click or right-click, then drag | Adds a point and moves it while you hold the button |
| Move a point | Drag | Shift keeps its time, Ctrl keeps its value, Alt ignores the snap |
| Bend a segment | Alt+drag up or down | Changes the tension of the segment under the mouse |
| Tension handle | Drag up or down | Bends the segment. Ctrl is finer, right-click makes it straight |
| Point on the curve | Shift+right-click | Adds a point on the line |
| Point menu | Right-click a point | Type value..., Copy value, Paste value, Delete point, and Whole curve to scale, flip or straighten everything |
| Zoom | Ctrl+wheel | Zooms the view |
| Scroll | Middle-drag | Moves the view |
LFO mode
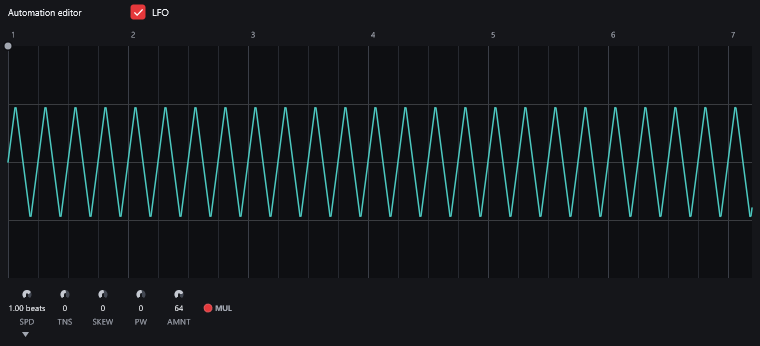
Tick LFO at the top of the editor. A waveform now shapes the clip's value, and the points you draw set the LFO's amplitude instead of the value itself.
| Setting | What it does |
|---|---|
SPD | The length of one cycle, in beats |
TNS | Tension of the wave |
SKEW | Skew of the wave |
PW | Pulse width |
AMNT | How far the LFO moves the value |
MUL | On: the LFO is multiplied with the envelope level. Off: it is added |
Events in a pattern
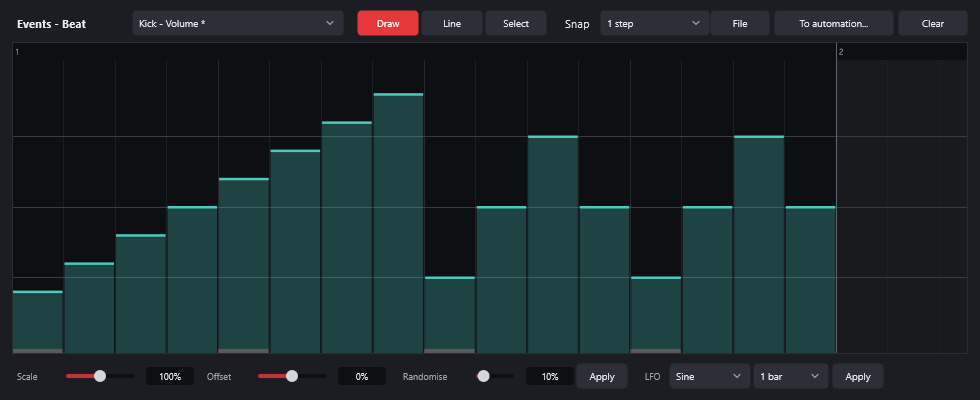
Events belong to a pattern and play wherever that pattern plays. Right-click a control and choose Edit events in the pattern to open the Event editor for it.
Drawsets values as you drag, and a right-drag erases.Linedraws a straight ramp.Selectmarks a time range for the tools at the bottom.Snapgoes from 1/2 step to 1 bar.Scale,OffsetandRandomisechange the events of the selection, or of the whole pattern.LFOwrites a sine, triangle or square over 1 beat to 4 bars.Clearremoves the events.To automation...turns the events into an automation clip and removes them from the pattern.Fileopens and saves the events as an.fscfile, and imports a MIDI file.
Init song with this position, in the same right-click menu, stores the value the control is reset to whenever the song starts.
Recording your moves
Turn on recording with Automation ticked in the recording filter, press play and move the control. In Song mode the moves become an automation clip. In Pattern mode they become events in the current pattern. See Recording.
Links and modulators
Link to MIDI controller (move a knob on the controller)is covered in MIDI controllers.Link to internal controllerlets an Envelope, Formula or Peak Controller in the project drive the control. Add one of them first.Modulateattaches a modulator, an LFO or a random source that moves a LYNX SHARE knob around its own value.Tools › Modulators...lists them.
Automation lanes
Lanes are off by default. Turn on Automation lanes in the Playlist's menu. Each track header then has a button that adds a lane under the track, and the control menu gains Automate in lane. In a lane, click to add or drag a point, right-click to delete one, and Alt+drag to bend the line. The lane's menu has To automation clip.
Good to know
- A new clip starts at the time selection if there is one, otherwise at the playhead in Song mode. Turn off
Create automation clips at the playback positioninOptions › General settings...to start at the beginning of the song. - Several clips on one control each play in their own place. Before its first clip, a control keeps its own value.
- At the start of a clip the control reaches the new value in about 8 ms. FL Studio glides there, so an imported project can differ slightly at those points.
- Where clips on the same control overlap, the one LYNX SHARE picks can differ from the one FL Studio picks.
- Modulators only work on LYNX SHARE's own knobs, and they are left out when you export to
.flp.